x
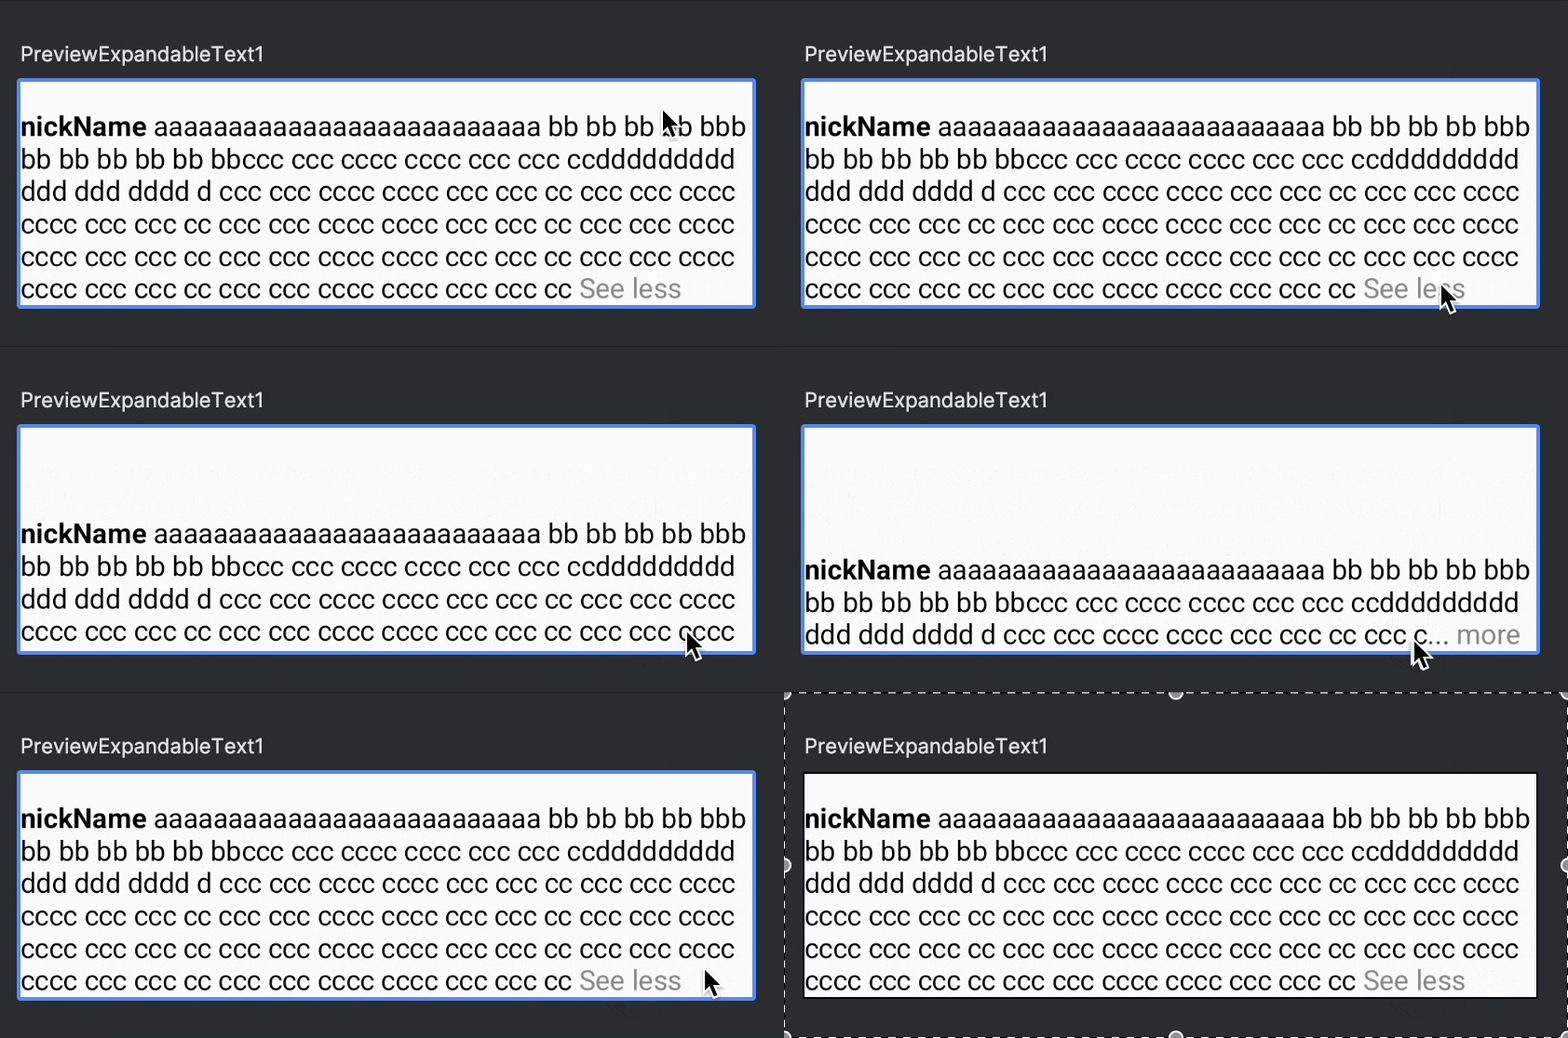
문장을 접고 펼칠 수 있는 기능이 필요하였다.
구글링으로 1차 적으로 검색을 하여 소스코드를 찾았고
이를 개선해서 앱에서 원하는 기능으로 수정하였다.
buildAnnotatedString 사용
위 함수를 사용하면 텍스트 에디터에서 문구에 여러 스타일을 설정 하듯이
텍스트 사이 원하는 스타일을 설정할 수 있다.
(The basic data structure of text with multiple styles.)
text 초기 설정
... more / see less 이 설정되지 않은 문구를 초기에 설정한다.
//닉네임 + 내용을 초기에 설정한 text 생성
var textWithMoreLess by remember { mutableStateOf(buildAnnotatedString {
    nickName?.let {
        withStyle(SpanStyle(color = expandableTextColor, fontWeight = FontWeight.Bold))
        {
            append(it)
        }
        append(" ")
    }
    withStyle(SpanStyle(color = expandableTextColor)) {
        append(text)
    }
}) }
접은상태 ...more 설정
접은 상태에서 text의 max line를 설정한다. (3줄로 설정하였다.)
/** 접혀있을 때 라인 수*/
private const val collaspLine = 3

ClickableText(
    ..
    maxLines = if (isExpanded) Int.MAX_VALUE else collaspLine,
    ..
)
TextLayoutResult의 overflow를 확인하기
maxLines를 설정하면
text 문구가 maxLines를 넘어가면 onTextLayout을 통해 현재 overflow 상태인지 확인 할 수 있다.
ClickableText(
    ....
    text = textWithMoreLess,
    maxLines = if (isExpanded) Int.MAX_VALUE else collaspLine,
    onTextLayout = { textLayoutResult = it },
    ....
)
isExpanded는 ... more와 see less를 클릭했을때 상태가 변경된다.
!isExpanded(접힌 상태) + it.hasVisualOverflow(텍스트가 maxline을 넘어감) 이 두가지 상태 값으로 ... more를 설정해준다.
LaunchedEffect(textLayoutResult) {
    textLayoutResult?.let {
        when {
            // 텍스트 확장 상태
            isExpanded -> {
                textWithMoreLess = originString(nickName, text, seeMoreandLessColor, expandableTextColor)
            }

            // 텍스트가 펼쳐지지 않은 상태이고 최대 줄 수를 초과하는 경우
            !isExpanded && it.hasVisualOverflow -> {
                val lastCharIndex = it.getLineEnd(collaspLine-1)
                textWithMoreLess = summarizedString(nickName, text, lastCharIndex, seeMoreandLessColor = seeMoreandLessColor, expandableTextColor = expandableTextColor)
                isClickable = true
            }
        }
    }
}
... more 설정하기
위의 TextLayoutResult에서 라인의 마지막 문자 index를 가져올 수 있는 유용한 기능이 있다.
val lastCharIndex = it.getLineEnd(collaspLine-1)
원본 문구에서 3번째 줄 마지막 문자의 index를 가져와 자르면
화면의 3줄에 해당하는 문구를 얻을 수 있다.
이 3줄의 문구에서 '... more' 만큼 마지막 문구를 버린다.
append(text.substring(0, lastCharIndex)
    .dropLast(showMoreString.length + nickName.length + 1) // ... more 추가를 위에 문장 자르기
    .dropLastWhile { it == ' ' || it == '.' }) // 주의: 조정한 글자가 오버플로우되면 무한 루프 발생
... more 구현 함수
fun summarizedString(
    nickName: String?,
    text: String,
    lastCharIndex: Int,
    showMoreString: String = "... more",
    seeMoreandLessColor: Color = Color.Unspecified,
    expandableTextColor: Color = Color.Unspecified,
): AnnotatedString {
    return buildAnnotatedString {
        //닉네임이 있는 경우
        if (nickName != null) {
            withStyle(
                SpanStyle(
                    color = expandableTextColor,
                    fontWeight = FontWeight.Bold
                )
            ) { append(nickName) }
            append(" ")
            withStyle(SpanStyle(color = expandableTextColor)) {
                // 내용 추가
                append(text.substring(0, lastCharIndex)
                    .dropLast(showMoreString.length + nickName.length + 1) // ... more 추가를 위에 문장 자르기
                    .dropLastWhile { it == ' ' || it == '.' }) // 주의: 조정한 글자가 오버플로우되면 무한 루프 발생
            }
        }
        //닉네임이 없는 경우
        else {
            withStyle(SpanStyle(color = expandableTextColor)) {
                // 내용 추가
                append(text.substring(0, lastCharIndex)
                    .dropLast(showMoreString.length + 1)  // ... more 추가를 위에 문장 자르기
                    .dropLastWhile { it == ' ' || it == '.' }) // 주의: 조정한 글자가 오버플로우되면 무한 루프 발생
            }
        }

        append("... ")
        pushStringAnnotation(tag = "show_more_tag", annotation = "")
        withStyle(SpanStyle(color = seeMoreandLessColor)) { append("more") }
        pop()
    }
}
'Android > Compose' 카테고리의 다른 글
| [compose] 핀치 줌 이미지 뷰어 (0) | 2025.04.22 |
|---|---|
| [compose] lifecycle (0) | 2024.07.28 |
| [compose] RatingBar 만들기 (0) | 2024.07.28 |
| [compose] ConstraintLayout (0) | 2024.07.26 |
| [compose] preview에서 권한(Permission) 요청 코드 작성하기 (0) | 2023.08.08 |